Setup a VPN Connection into a PrivateLink ROSA Cluster with OpenVPN
This content is authored by Red Hat experts, but has not yet been tested on every supported configuration.
When you configure a Red Hat OpenShift on AWS (ROSA) cluster with a private link configuration, you will need connectivity to this private network in order to access your cluster. This guide will show you how to configute an AWS Client VPN connection so you won’t need to setup and configure Jump Boxes.
Prerequisites
- a private link ROSA Cluster - follow this guide to create a private ROSA Cluster
- jq
Set Envrionment Variables
Start by setting environment variables that we will use to setup the VPN connection
export ROSA_CLUSTER_NAME=<rosa cluster name>

export REGION=$(rosa describe cluster -c $ROSA_CLUSTER_NAME  -o json | jq -r .region.id)

export VPN_CLIENT_CIDR=172.16.0.0/16

export PRIVATE_SUBNET_IDS=$(rosa describe cluster -c $ROSA_CLUSTER_NAME -o json | jq -r '.aws.subnet_ids[]')
Create certificates to use for your VPN Connection
There are many ways and methods to create certificates for VPN, the guide below is one of the ways that works well. Note, that whatever method you use, make sure it supports “X509v3 Extended Key Usage”.
Clone OpenVPN/easy-rsa
git clone https://github.com/OpenVPN/easy-rsa.gitChange to the easyrsa directory
cd easy-rsa/easyrsa3Initialize the PKI
./easyrsa init-pkiEdit certificate parameters
Uncomment and edit the copied template with your values
vim pki/varsset_var EASYRSA_REQ_COUNTRY "US" set_var EASYRSA_REQ_PROVINCE "California" set_var EASYRSA_REQ_CITY "San Francisco" set_var EASYRSA_REQ_ORG "Copyleft Certificate Co" set_var EASYRSA_REQ_EMAIL "me@example.net" set_var EASYRSA_REQ_OU "My Organizational Unit"Uncomment (remove the #) the folowing field
#set_var EASYRSA_KEY_SIZE 2048Create the CA:
./easyrsa build-ca nopassGenerate the Server Certificate and Key
./easyrsa build-server-full server nopassGenerate Diffie-Hellman (DH) parameters
./easyrsa gen-dhGenerate client credentials
./easyrsa build-client-full aws nopass
Import certficates into AWS Certificate Manager
Import the server certificate
- Before running the below commands, make sure you are still in the pki directory under the easyrsa3 directory
SERVER_CERT_ARN=$(aws acm import-certificate \
--certificate fileb://issued/server.crt \
--private-key fileb://private/server.key \
--certificate-chain fileb://ca.crt \
--region $REGION \
--query CertificateArn \
--output text)
Import the client certificate
CLIENT_CERT_ARN=$(aws acm import-certificate  \
--certificate fileb://issued/aws.crt \
--private-key fileb://private/aws.key \
--certificate-chain fileb://ca.crt \
--region $REGION \
--query CertificateArn \
--output text)
Create a Client VPN Endpoint
Retrieve the VPN Client ID
 VPN_CLIENT_ID=$(aws ec2 create-client-vpn-endpoint \
 --client-cidr-block $VPN_CLIENT_CIDR \
 --server-certificate-arn $SERVER_CERT_ARN \
 --authentication-options Type=certificate-authentication,MutualAuthentication={ClientRootCertificateChainArn=$CLIENT_CERT_ARN} \
 --connection-log-options Enabled=false --split-tunnel --query ClientVpnEndpointId --output text)
Associate each private subnet with the client VPN endpoint
while IFS= read -r subnet;
do
   echo "Associcating subnet '$subnet'"
   aws ec2 associate-client-vpn-target-network --subnet-id $subnet --client-vpn-endpoint-id $VPN_CLIENT_ID
done <<< "$PRIVATE_SUBNET_IDS"
Add an ingress authorization rule to a Client VPN endpoint
aws ec2 authorize-client-vpn-ingress \
 --client-vpn-endpoint-id $VPN_CLIENT_ID \
 --target-network-cidr 0.0.0.0/0 \
 --authorize-all-groups
Configure your OpenVPN Client
Download the VPN Client Configuration
aws ec2 export-client-vpn-client-configuration --client-vpn-endpoint-id $VPN_CLIENT_ID --output text>client-config.ovpnRun the following commands to add the certificates created in the first step to the VPN Configuration file.
- note: make sure you are still in the easy rsa / pki directory.
echo '<cert>' >> client-config.ovpn

openssl x509 -in issued/aws.crt >> client-config.ovpn

echo '</cert>' >> client-config.ovpn

echo '<key>' >> client-config.ovpn

cat private/aws.key >> client-config.ovpn

echo '</key>' >> client-config.ovpn
Add DNS Entries
In order to resolve the ROSA Cluster domain name, you will need to either add the DNS server and the Route 53 Hosted Domain for the cluster to your VPN settings or /etc/hosts in machine you are connecting from.
The DNS server will be the x.x.x.2 address of your VPC CIDR. For example, if you VPC CIDR is 10.66.0.0/16 then your DNS server will be 10.66.0.2
You can find the VPC ( machine ) CIDR with this command:
rosa describe cluster -c $ROSA_CLUSTER_NAME -o json | jq -r '.network.machine_cidr'You can find the ROSA base domain with this command:
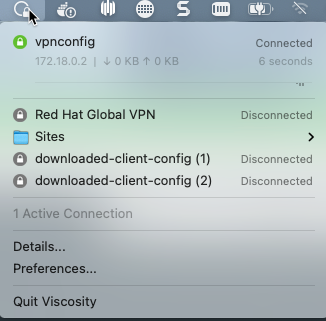
rosa describe cluster -c $ROSA_CLUSTER_NAME -o json | jq -r '.dns.base_domain'Import the client-config.ovpn file into your VPN Software.
Mac users - just double click the client-config.ovpn and it will be imported automatically into your VPN client.
Note: In order to connect to your cluster with the oc cli, you will need to update your OS DNS server with the DNS Server above after you connected to VPN.
Connect your VPN.