Installing the Open Data Hub Operator
This content is authored by Red Hat experts, but has not yet been tested on every supported configuration.
The Open Data Hub operator is available for deployment in the OpenShift OperatorHub as a Community Operators. You can install it from the OpenShift web console:
From the OpenShift web console, log in as a user with cluster-admin privileges. For a developer installation from try.openshift.com including AWS and CRC, the kubeadmin user will work.
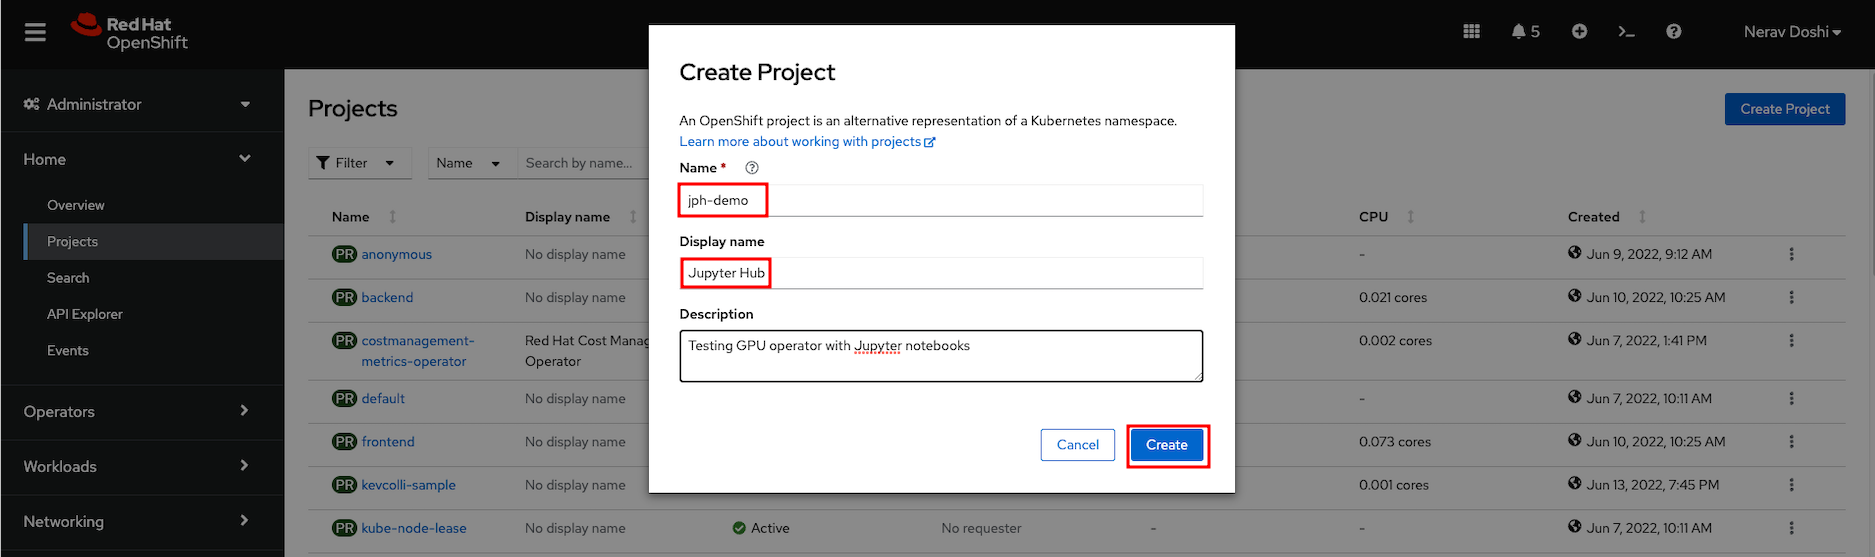
Create a new project named ‘jph-demo’ for your installation of Open Data Hub
Find Open Data Hub in the OperatorHub catalog.
- Select the new namespace if not already selected.
- Under Operators, select OperatorHub for a list of operators available for deployment.
- Filter for Open Data Hub or look under Big Data for the icon for Open Data Hub.
Click the Install button and follow the installation instructions to install the Open Data Hub operator.(optional if operator not installed)
The subscription creation view will offer a few options including Update Channel, keep the rolling channel selected.
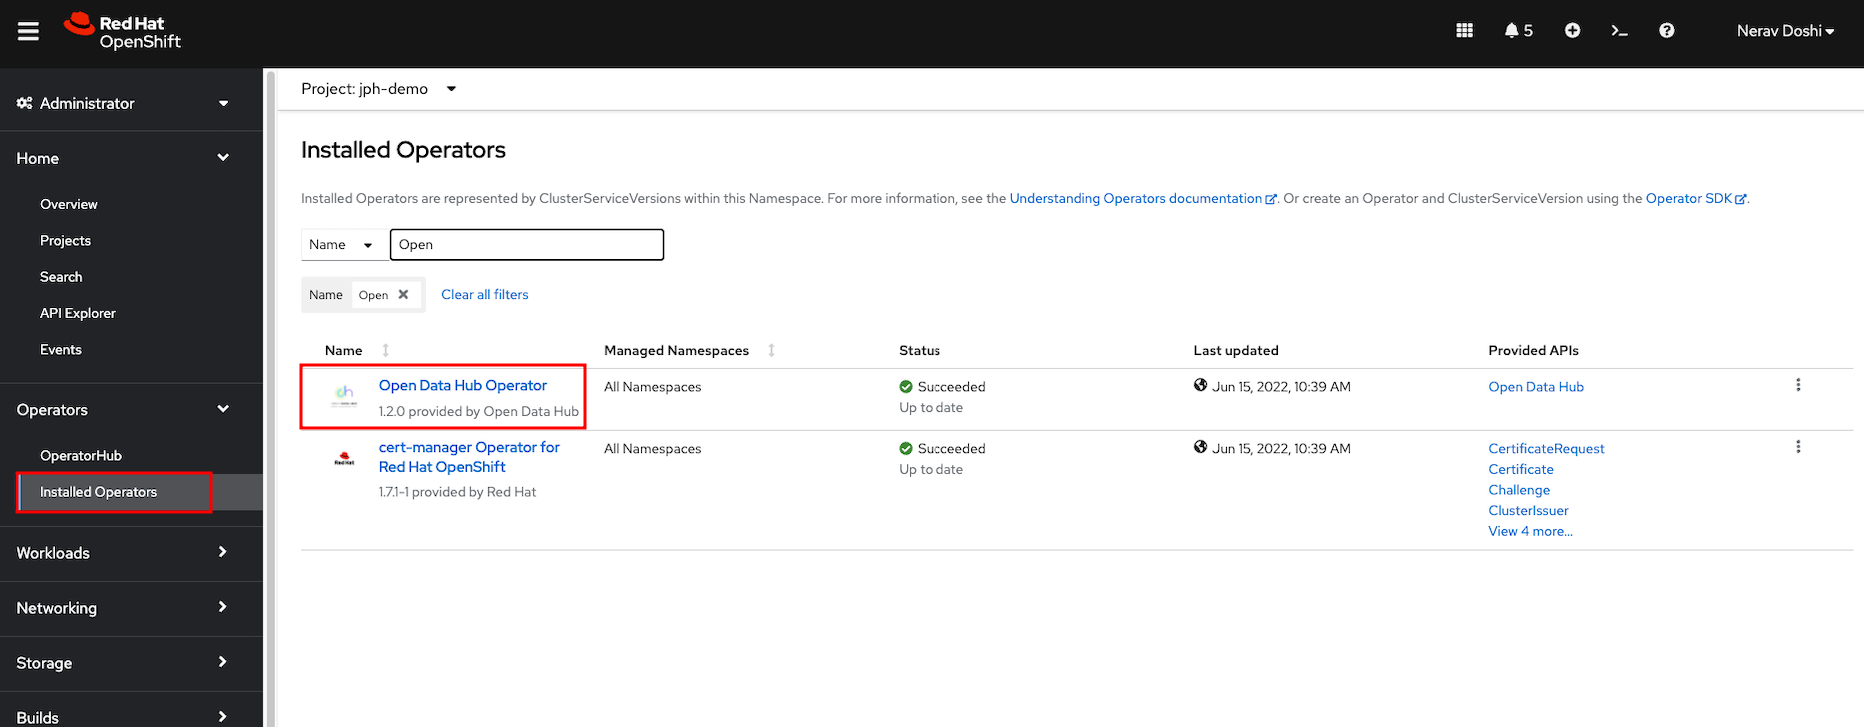
To view the status of the Open Data Hub operator installation, find the Open Data Hub Operator under Operators -> Installed Operators (inside the project you created earlier). Once the STATUS field displays InstallSucceeded, you can proceed to create a new Open Data Hub deployment.
Find the Open Data Hub Operator under Installed Operators (inside the project you created earlier)
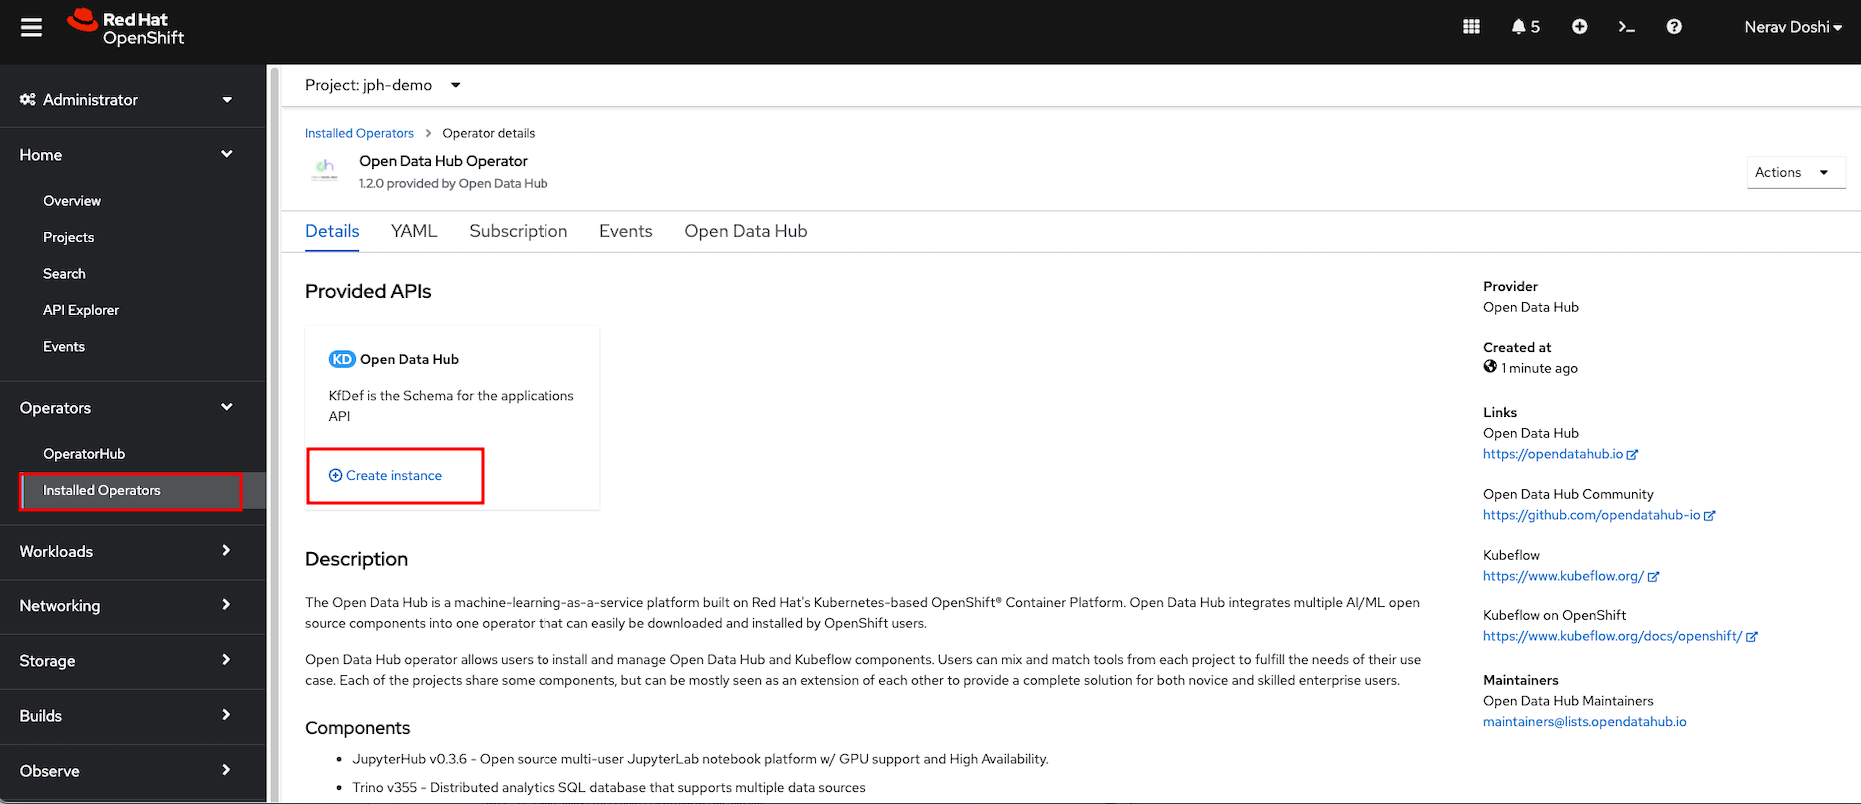
Click on the Open Data Hub Operator to bring up the details for the version that is currently installed.
Click Create Instance to create a new deployment.
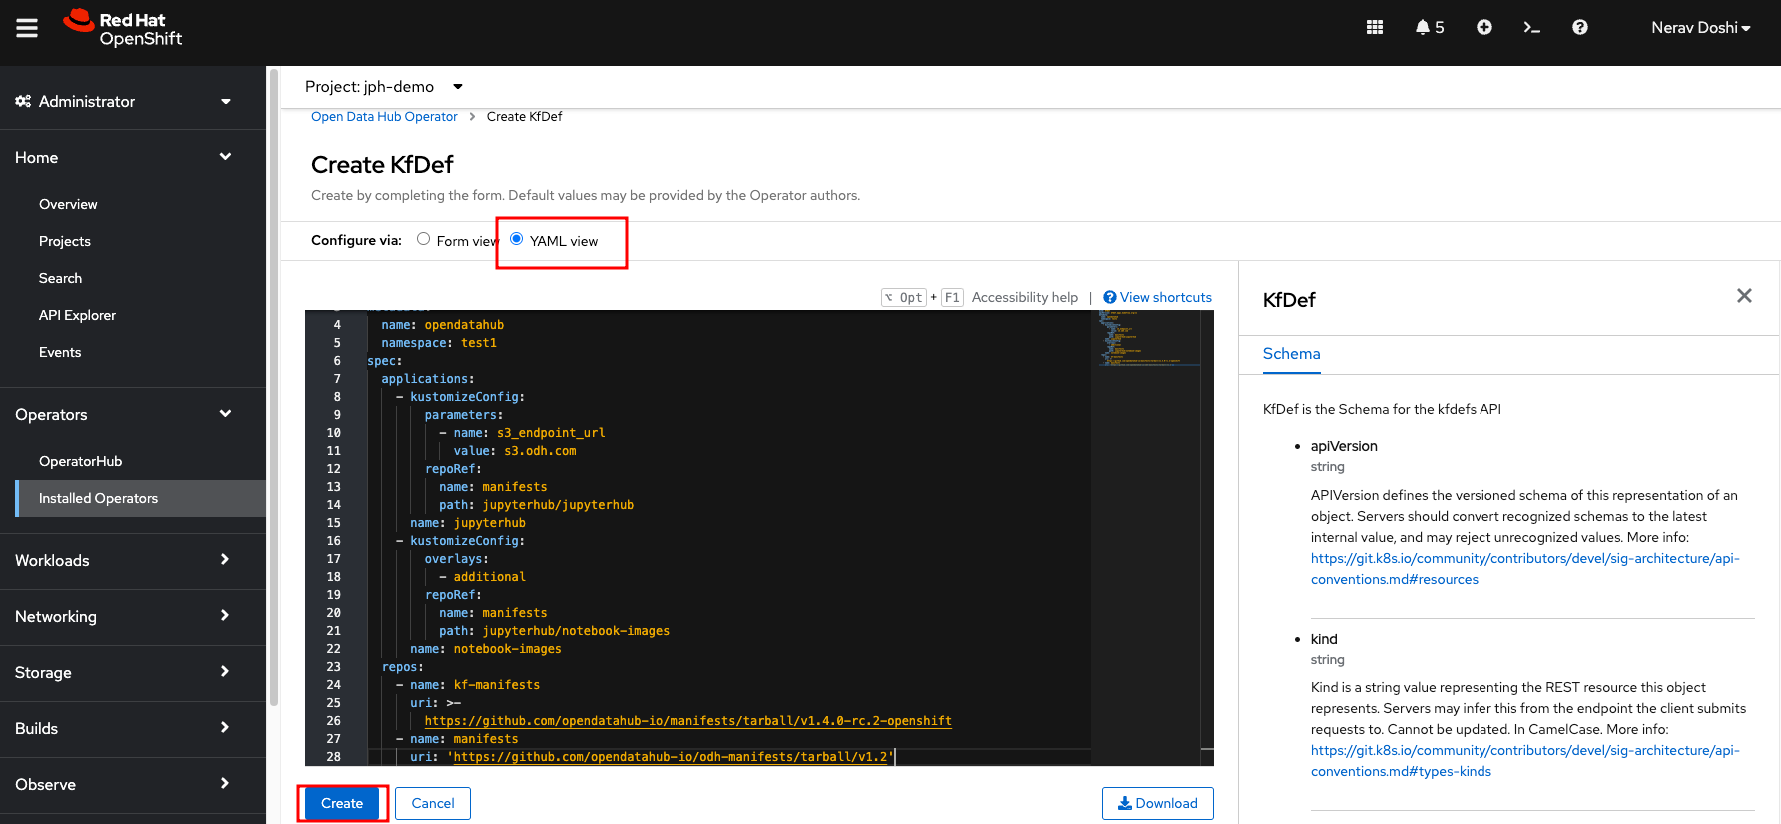
- Select the YAML View radio button to be presented with a YAML file to customize your deployment. Most of the components available in ODH have been removed, and only components for JupyterHub are required for this example.
apiVersion: kfdef.apps.kubeflow.org/v1
kind: KfDef
metadata:
  creationTimestamp: '2022-06-24T18:55:12Z'
  finalizers:
    - kfdef-finalizer.kfdef.apps.kubeflow.org
  generation: 2
  managedFields:
    - apiVersion: kfdef.apps.kubeflow.org/v1
      fieldsType: FieldsV1
      fieldsV1:
        'f:spec':
          .: {}
          'f:applications': {}
          'f:repos': {}
      manager: Mozilla
      operation: Update
      time: '2022-06-24T18:55:12Z'
    - apiVersion: kfdef.apps.kubeflow.org/v1
      fieldsType: FieldsV1
      fieldsV1:
        'f:metadata':
          'f:finalizers':
            .: {}
            'v:"kfdef-finalizer.kfdef.apps.kubeflow.org"': {}
        'f:status': {}
      manager: opendatahub-operator
      operation: Update
      time: '2022-06-24T18:55:12Z'
  name: opendatahub
  namespace: jph-demo
  resourceVersion: '27393048'
  uid: f54399a6-faa7-4724-bf3d-be04a63d3120
spec:
  applications:
    - kustomizeConfig:
        repoRef:
          name: manifests
          path: odh-common
      name: odh-common
    - kustomizeConfig:
        parameters:
          - name: s3_endpoint_url
            value: s3.odh.com
        repoRef:
          name: manifests
          path: jupyterhub/jupyterhub
      name: jupyterhub
    - kustomizeConfig:
        overlays:
          - additional
        repoRef:
          name: manifests
          path: jupyterhub/notebook-images
      name: notebook-images
  repos:
    - name: kf-manifests
      uri: >-
        https://github.com/opendatahub-io/manifests/tarball/v1.4.0-rc.2-openshift
    - name: manifests
      uri: 'https://github.com/opendatahub-io/odh-manifests/tarball/v1.2'
status: {}
Update the spec of the resource to match the above and click Create. If you accepted the default name, this will trigger the creation of an Open Data Hub deployment named opendatahub with JupyterHub.
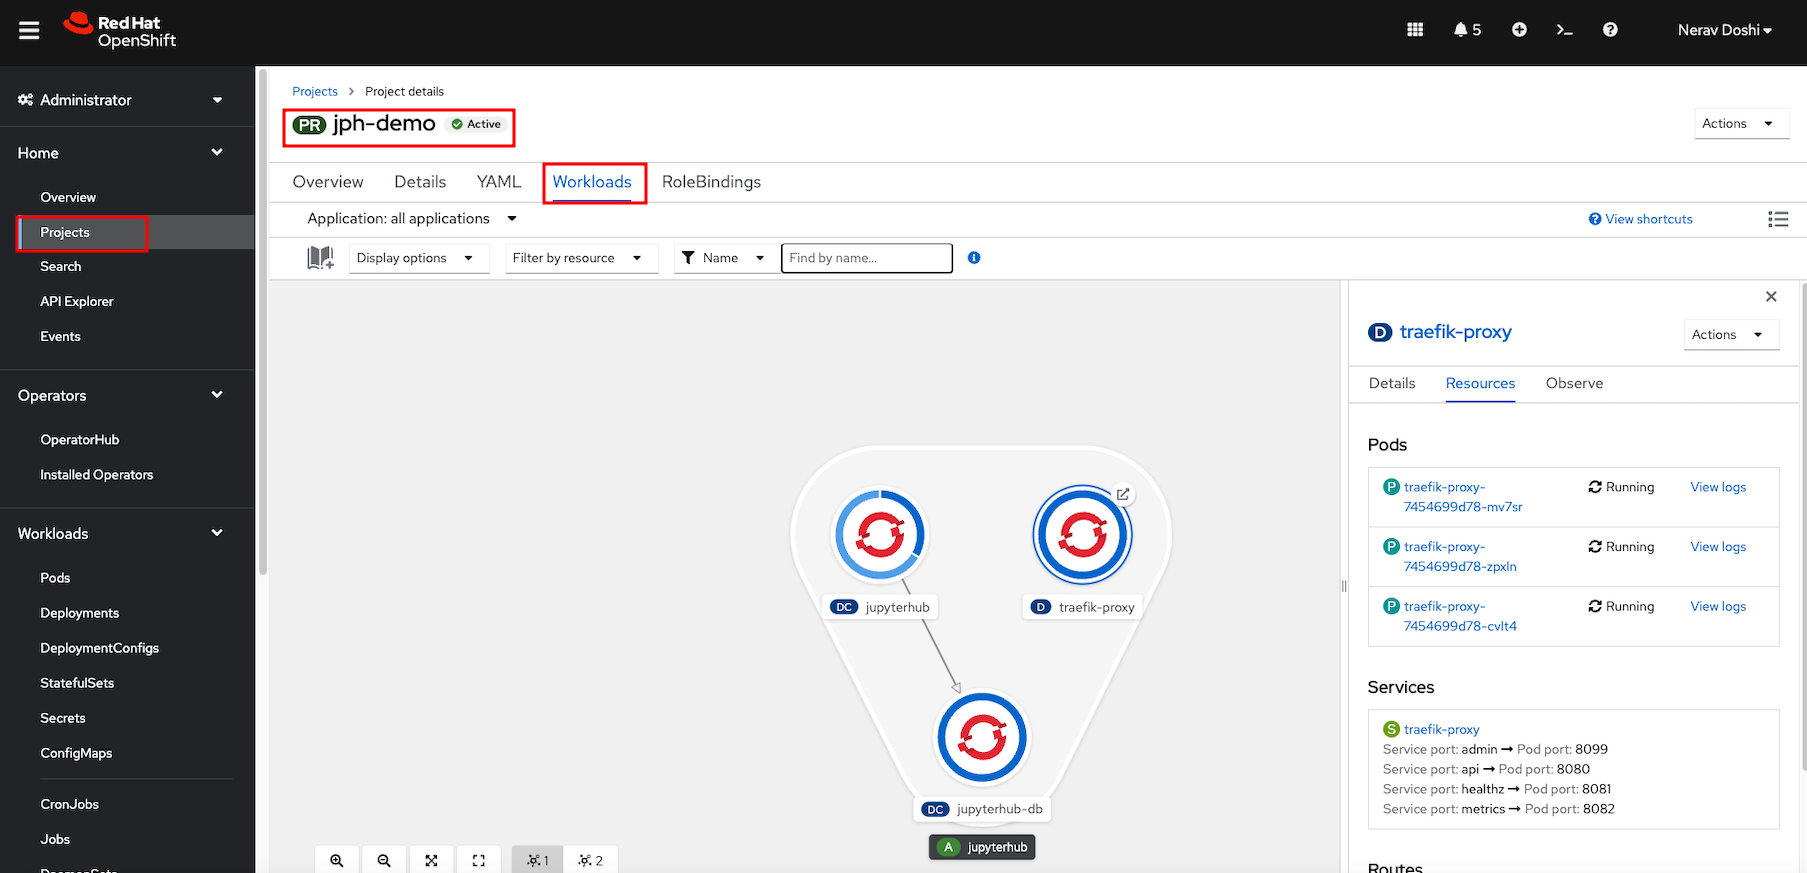
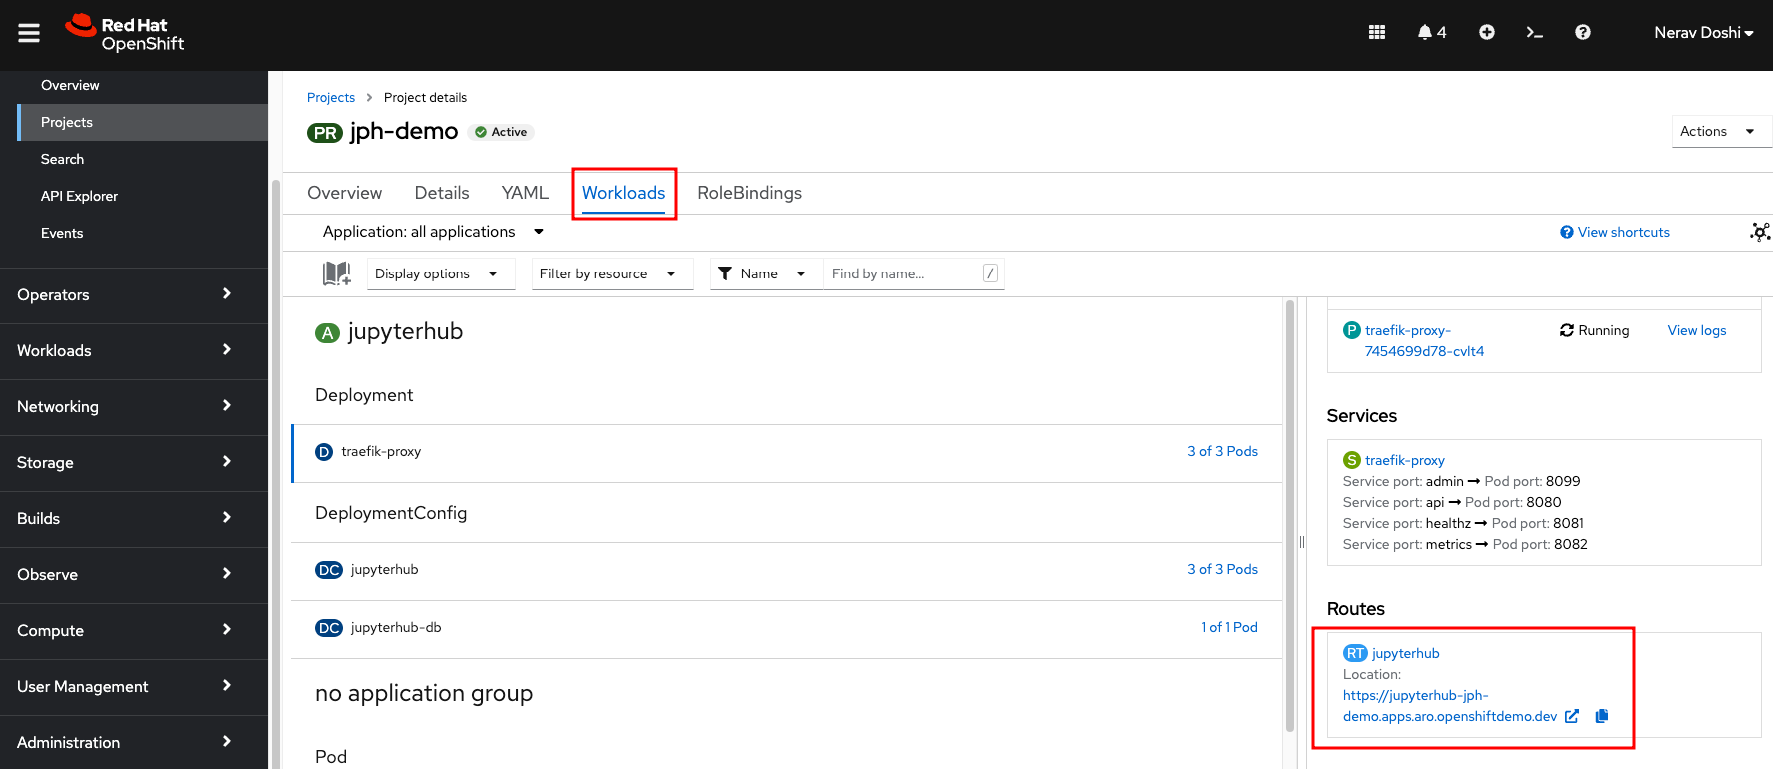
Verify the installation by viewing the project workload. JupyterHub and traefik-proxy should be running.
Click Routes under Networking and url to launch Jupyterhub is created
Open JupyterHub on web browser
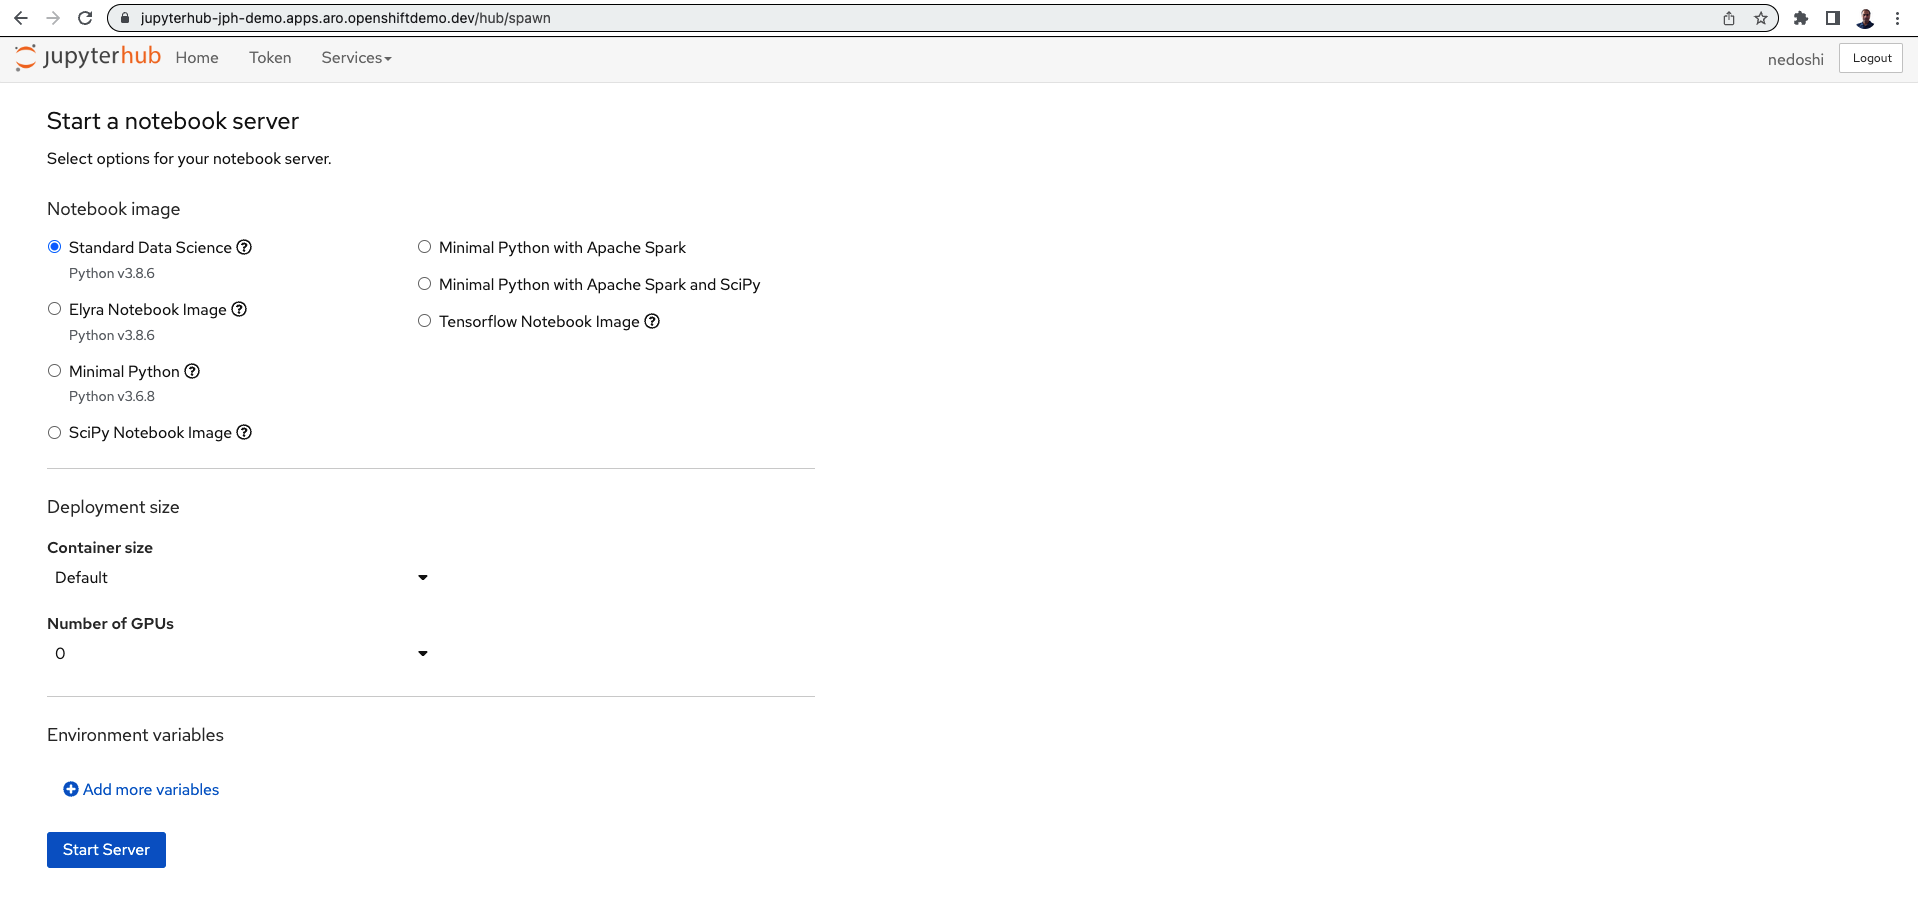
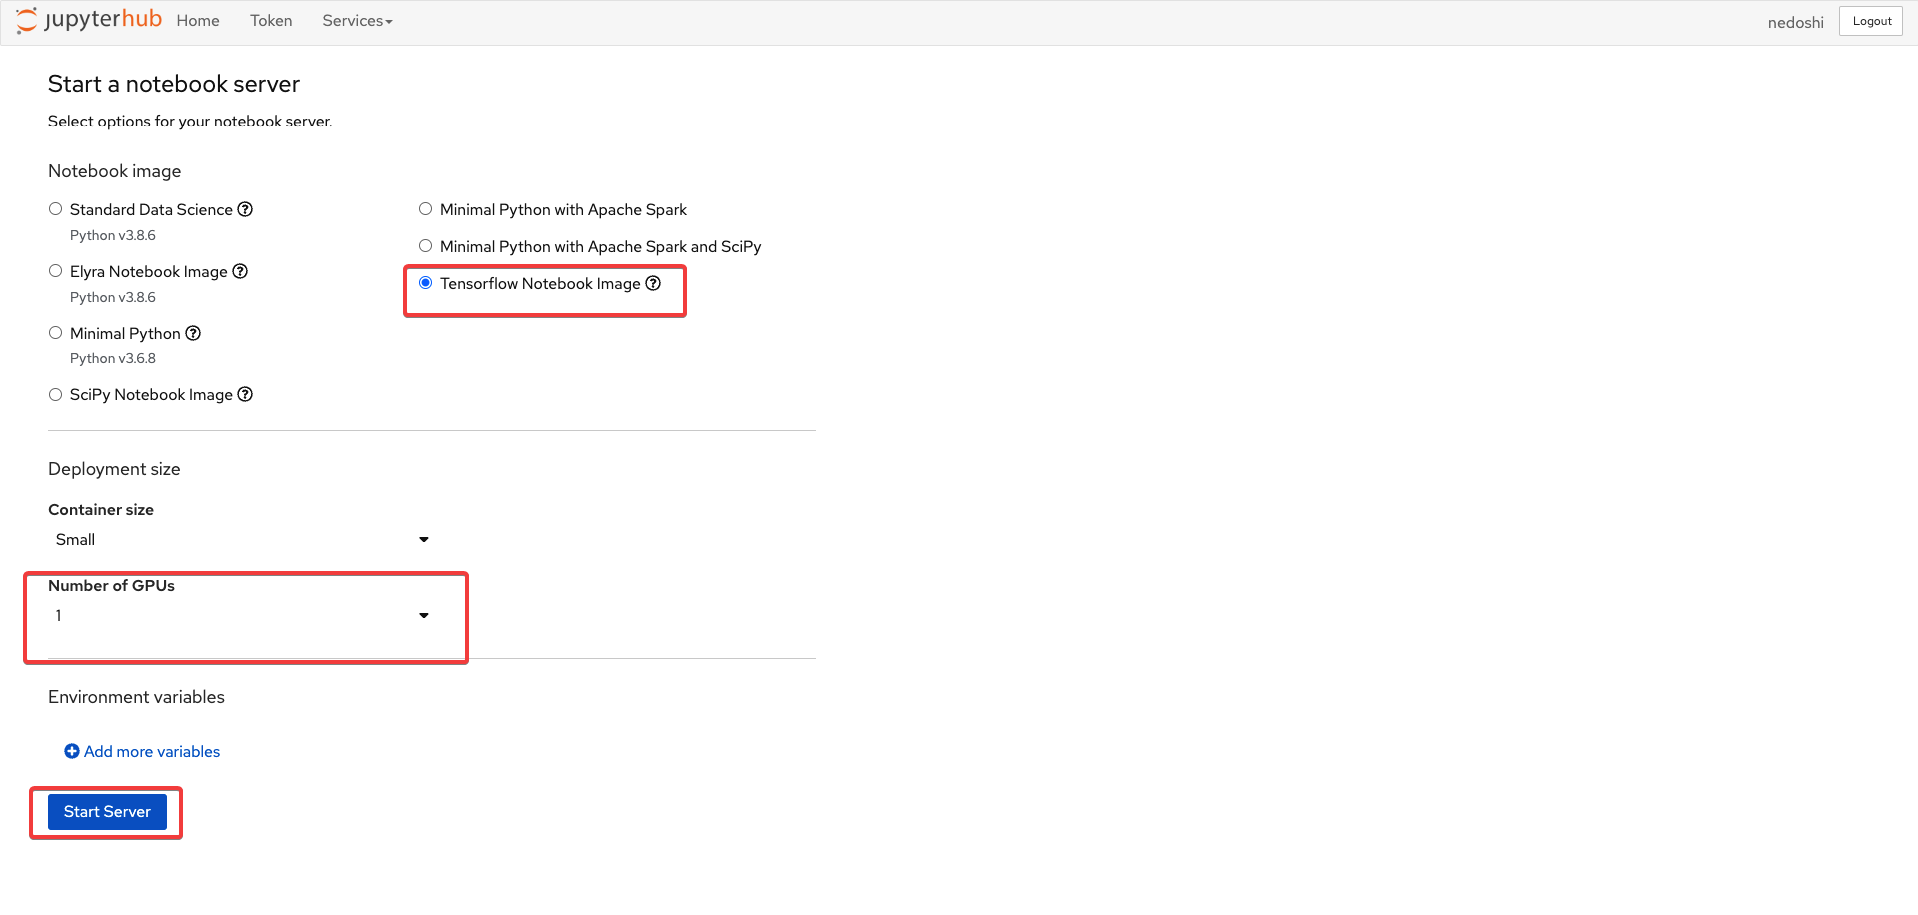
Configure GPU and start server
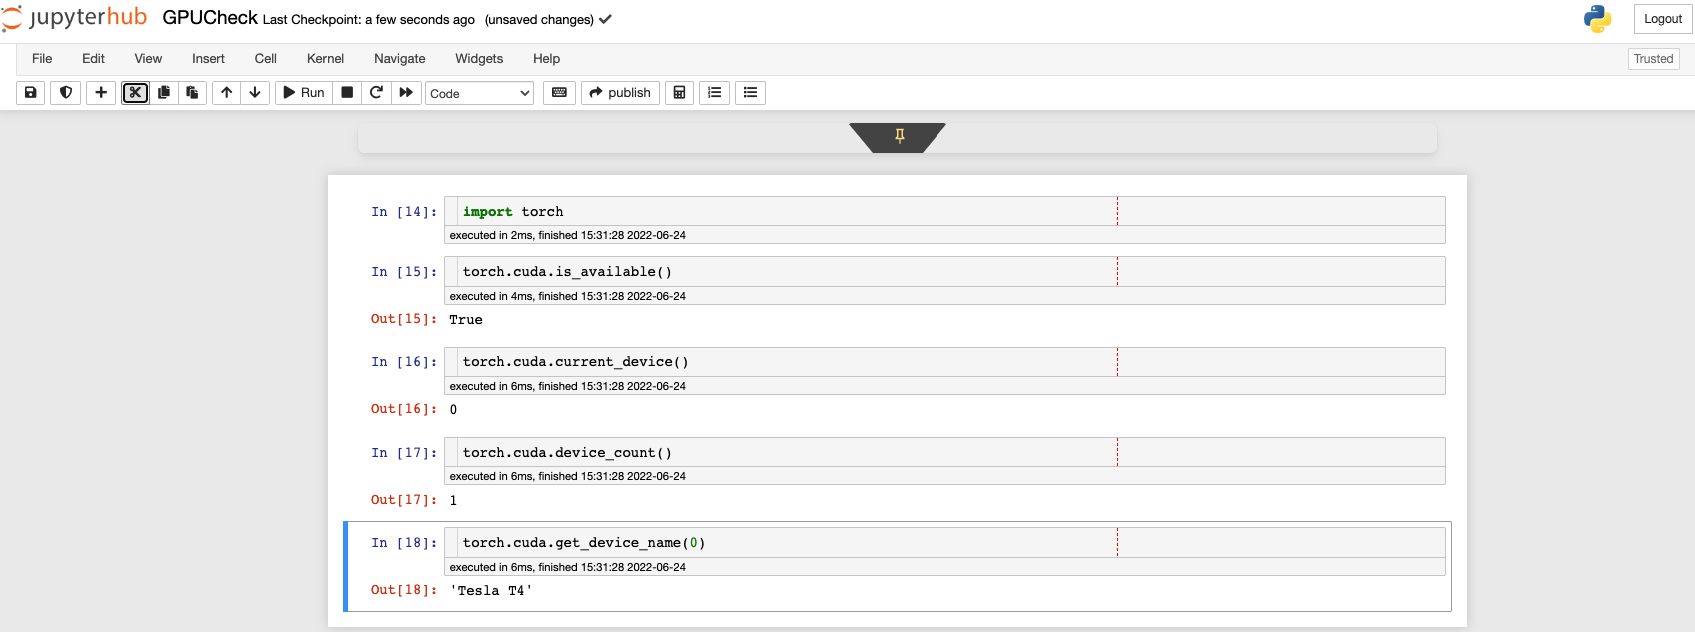
Check for GPU in notebook
Reference: Check the blog on Using the NVIDIA GPU Operator to Run Distributed TensorFlow 2.4 GPU Benchmarks in OpenShift 4