How to deploy Jupyter Notebook
This content is authored by Red Hat experts, but has not yet been tested on every supported configuration.
Retrieve the login command
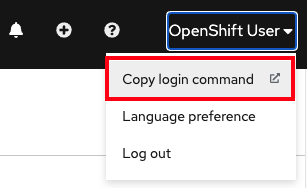
If you are not logged in via the CLI, access your cluster via the web console, then click on the dropdown arrow next to your name in the top-right and select Copy Login Command.
A new tab will open and select the authentication method you are using (in our case it’s github)
Click Display Token
Copy the command under where it says “Log in with this token”. Then go to your terminal and paste that command and press enter. You will see a similar confirmation message if you successfully logged in.
oc login --token=RYhFlXXXXXXXXXXXX --server=https://api.osd4-demo.abc1.p1.openshiftapps.com:6443
Logged into "https://api.osd4-demo.abc1.p1.openshiftapps.com:6443" as "openshiftuser" using the token provided.

You don't have any projects. You can try to create a new project, by running

oc new-project <projectname>
Create new project
Create a new project called “notebook-demo” in your cluster by entering the following command:
oc new-project notebook-demo
You should receive the following response
Now using project "notebook-demo" on server "https://api.aro.openshiftdemo.dev:6443".

You can add applications to this project with the 'new-app' command. For example, try:

    oc new-app rails-postgresql-example

to build a new example application in Ruby. Or use kubectl to deploy a simple Kubernetes application:

  kubectl create deployment hello-node --image=k8s.gcr.io/e2e-test-images/agnhost:2.33 -- /agnhost serve-hostname
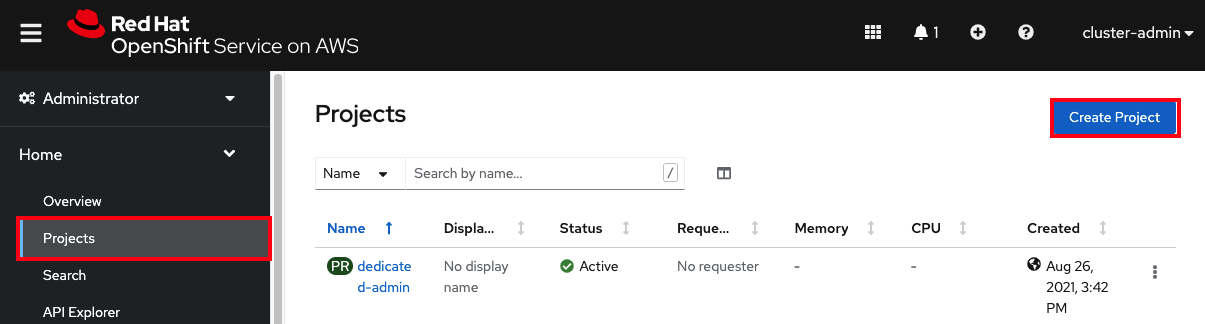
Equivalently you can also create this new project using the web console UI by clicking on “Projects” under “Home” on the left menu, and then click “Create Project” button on the right.
 Importing the Minimal Notebook
A pre-built version of the minimal notebook which is based on CentOS, can be found at on quay.io at:
The name of the latest build version of this image is:
- quay.io/jupyteronopenshift/s2i-minimal-notebook-py36:latest
Although this image could be imported into an OpenShift cluster using oc import-image, it is recommended instead that you load it using the supplied image stream definition, using:
oc create -f https://raw.githubusercontent.com/jupyter-on-openshift/jupyter-notebooks/master/image-streams/s2i-minimal-notebook.json
This is preferred, as it will create an image stream with tag corresponding to the Python version being used, with the underlying image reference referring to a specific version of the image on quay.io, rather than the latest build. This ensures that the version of the image doesn’t change to a newer version of the image which you haven’t tested.
Once the image stream definition is loaded, the project it is loaded into should have the tagged image:
- s2i-minimal-notebook:3.6
Deploying the Minimal Notebook
To deploy the minimal notebook image run the following commands:
oc new-app s2i-minimal-notebook:3.6 --name minimal-notebook \
    --env JUPYTER_NOTEBOOK_PASSWORD=mypassword
The JUPYTER_NOTEBOOK_PASSWORD environment variable will allow you to access the notebook instance with a known password.
Deployment should be quick if you build the minimal notebook from source code. If you used the image stream, the first deployment may be slow as the image will need to be pulled down from quay.io. You can monitor progress of the deployment if necessary by running:
oc rollout status deployment/minimal-notebook
Because the notebook instance is not exposed to the public network by default, you will need to expose it. To do this, and ensure that access is over a secure connection run:
oc create route edge minimal-notebook --service minimal-notebook \
    --insecure-policy Redirect
To see the hostname which is assigned to the notebook instance, run:
oc get route/minimal-notebook
Access the hostname shown using your browser and enter the password you used above.
To delete the notebook instance when done, run:
oc delete all --selector app=minimal-notebook
Creating Custom Notebook Images
To create custom notebooks images, you can use the s2i-minimal-notebook:3.6 image as an S2I builder. This repository contains two examples for extending the minimal notebook. These can be found in:
These are intended to mimic the images of the same name available from the Jupyter project.
In the directories you will find a requirements.txt file listing the additional Python packages that need to be installed from PyPi. You will also find a .s2i/bin/assemble script which will be triggered by the S2I build process, and which installs further packages and extensions.
To use the S2I build process to create a custom image, you can then run the command:
oc new-build --name custom-notebook \
  --image-stream s2i-minimal-notebook:3.6 \
  --code https://github.com/jupyter-on-openshift/jupyter-notebooks \
  --context-dir scipy-notebook
If any build of a custom image fails because the default memory limit on builds in your OpenShift cluster is too small, you can increase the limit by running:
oc patch bc/custom-notebook \
  --patch '{"spec":{"resources":{"limits":{"memory":"1Gi"}}}}'
and start a new build by running:
oc start-build bc/custom-notebook
If using the custom notebook image with JupyterHub running in OpenShift, you may also need to set the image lookup policy on the image stream created.
oc set image-lookup is/custom-notebook
This is necessary so that the image stream reference in the pod definition created by JupyterHub will be able to resolve the name to that of the image stream.
For the scipy-notebook and tensorflow-notebook examples provided, if you wish to use the images, instead of running the above commands, after you have loaded the image stream for, or built the minimal notebook image, you can instead run the commands:
oc create -f https://raw.githubusercontent.com/jupyter-on-openshift/jupyter-notebooks/master/build-configs/s2i-scipy-notebook.json
oc create -f https://raw.githubusercontent.com/jupyter-on-openshift/jupyter-notebooks/master/build-configs/s2i-tensorflow-notebook.json
When creating a custom notebook image, the directory in the Git repository the S2I build is run against can contain a requirements.txt file listing the Python package to be installed in the custom notebook image. Any other files in the directory will also be copied into the image. When the notebook instance is started from the image, those files will then be present in your workspace.