Using Group Sync Operator with Azure Active Directory and ROSA
This content is authored by Red Hat experts, but has not yet been tested on every supported configuration.
This guide focuses on how to synchronize Identity Provider (IDP) groups and users after configuring authentication in OpenShift Cluster Manager (OCM). For an IDP configuration example, please reference the Configure Azure AD as an OIDC identity provider for ROSA/OSD guide.
To set up group synchronization from Azure Active Directory (AD) to ROSA/OSD you must:
- Define groups and assign users in Azure AD
- Add the required API permissions to the app registration in Azure AD
- Install the Group Sync Operator from the OpenShift Operator Hub
- Create and configure a new Group Sync instance
- Set a synchronization schedule
- Test the synchronization process
Define groups and assign users in Azure AD
To synchronize groups and users with ROSA/OSD they must exist in Azure AD
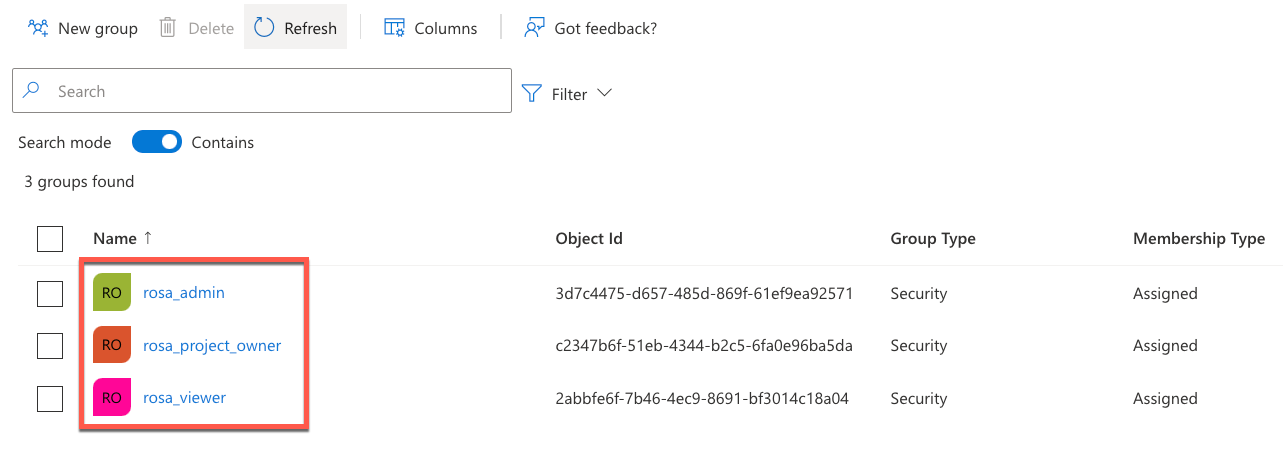
Create groups to syncronize with ROSA/OSD if they do not already exist
Create user IDs to synchronize with ROSA/OSD if they do not already exist
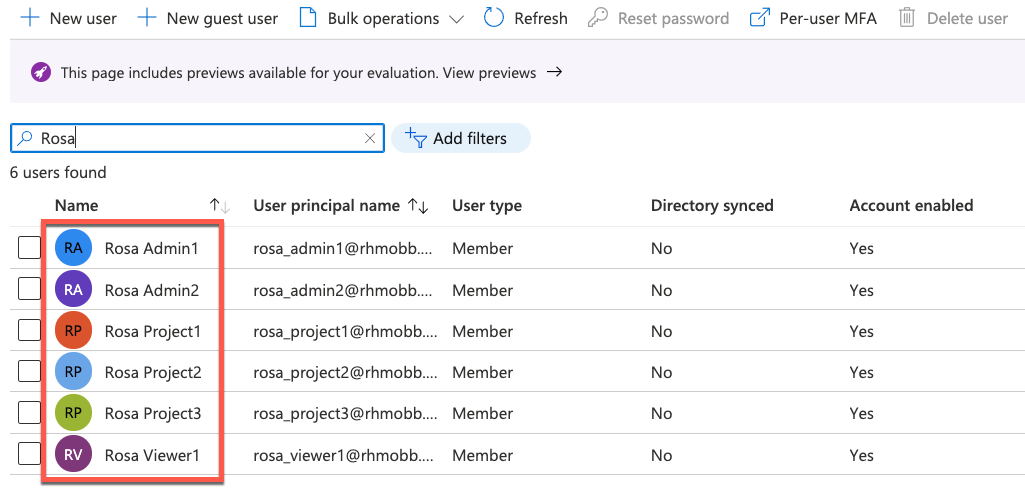
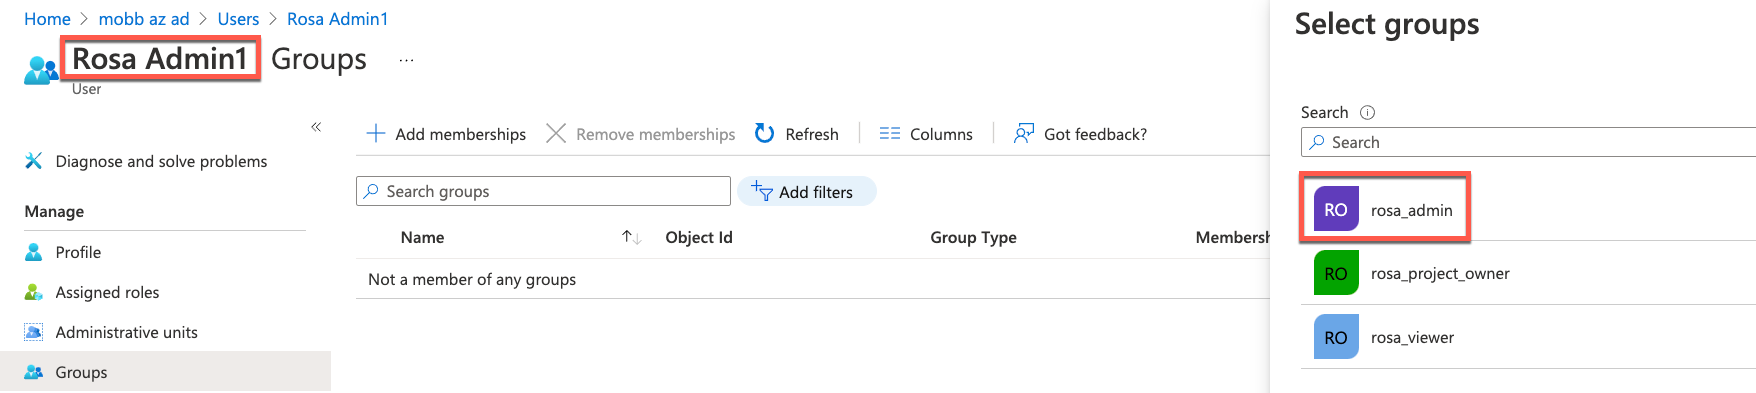
Assign newly created users to the appropriate group
Add API Permissions to Azure AD App Registration
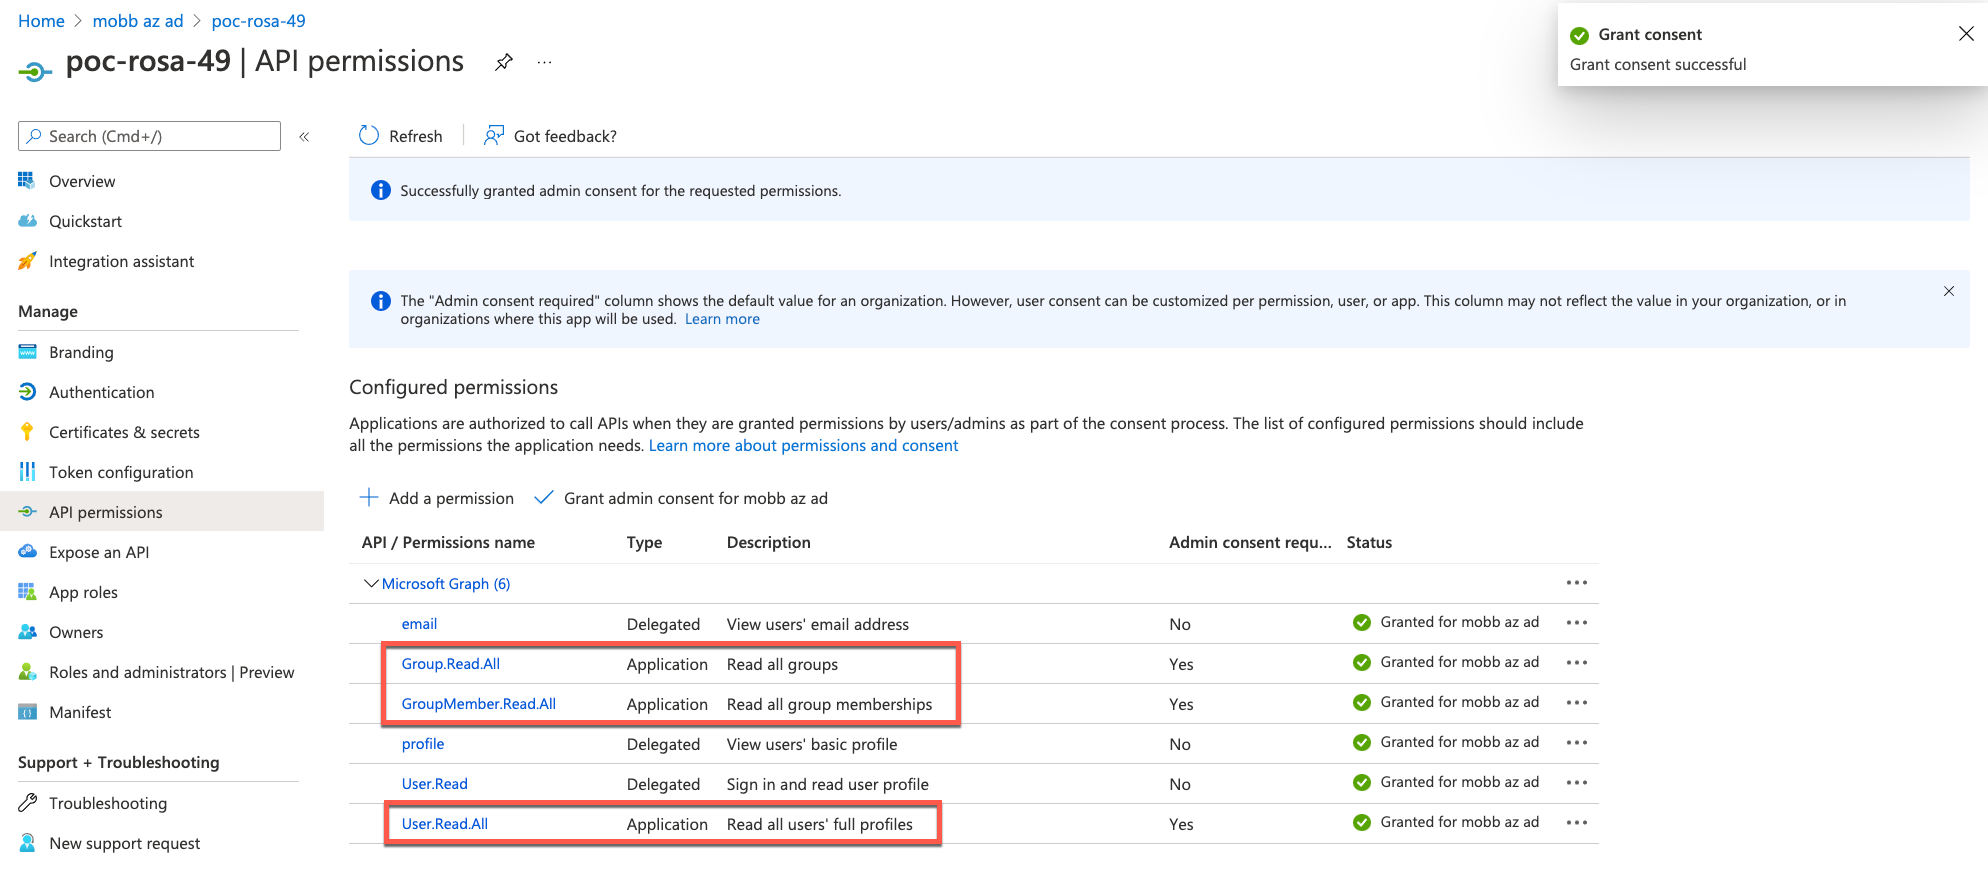
The GroupSync job requires permissions on the Azure AD tenant beyond those of the OIDC IdP. For it to work, add the these entries:
Group.Read.AllGroupMember.Read.AllUser.Read.All
..under the ‘API Permissions’ menu item. These three should all be ‘Application’ rather than ‘Delegated’ and this will require clicking on ‘Grant admin consent’ button above the permissions list. When done, the screen should look like this:
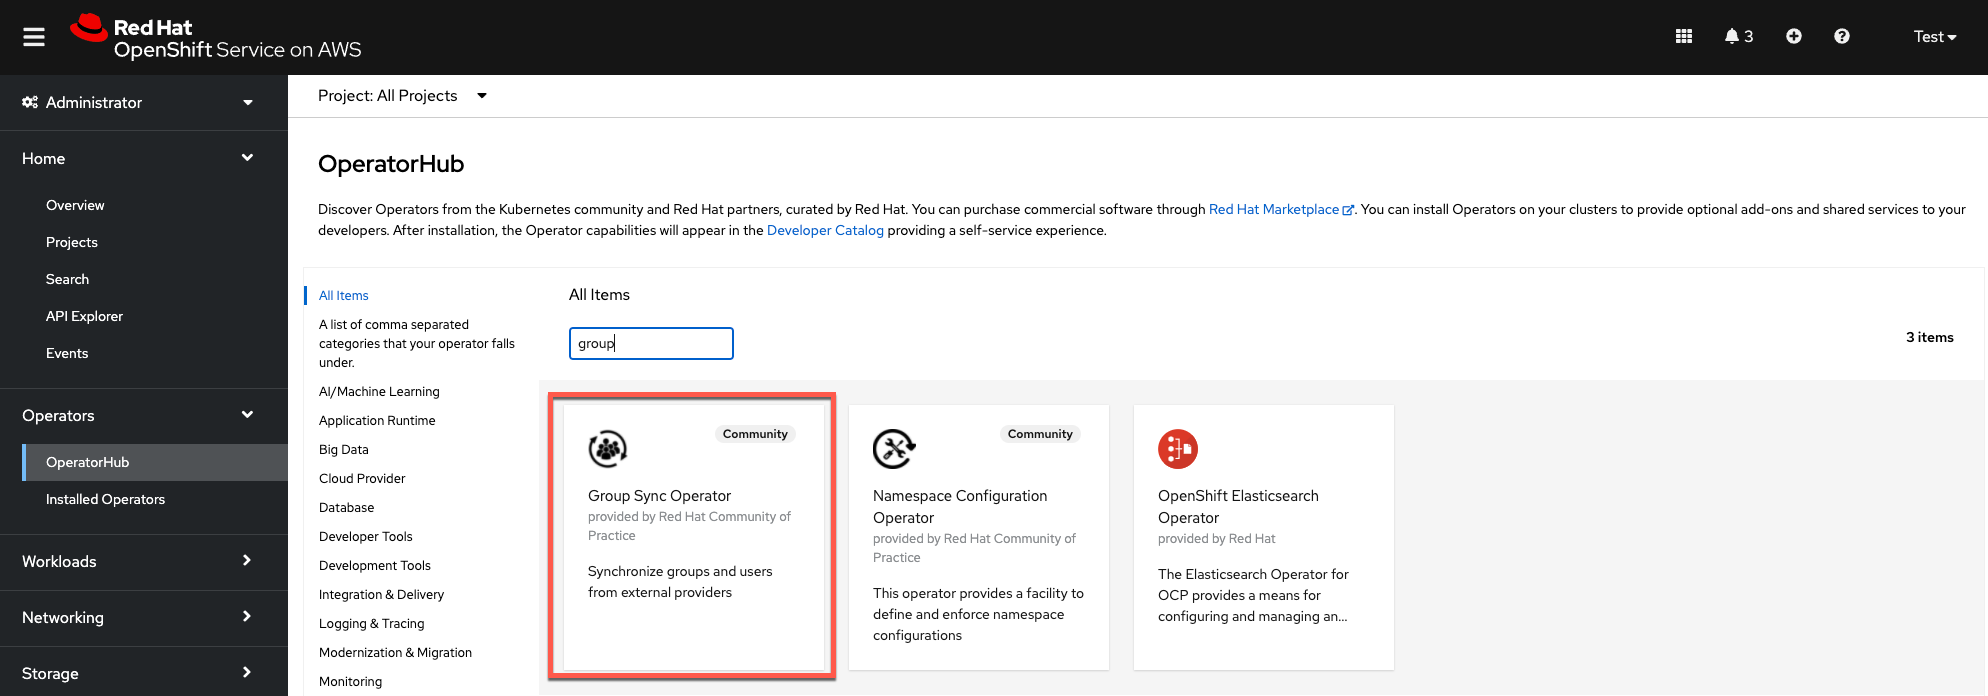
Install the Group Sync Operator from the OpenShift Operator Hub
In the OpenShift Operator Hub find the Group Sync Operator
Install the operator in the
group-sync-operatornamespace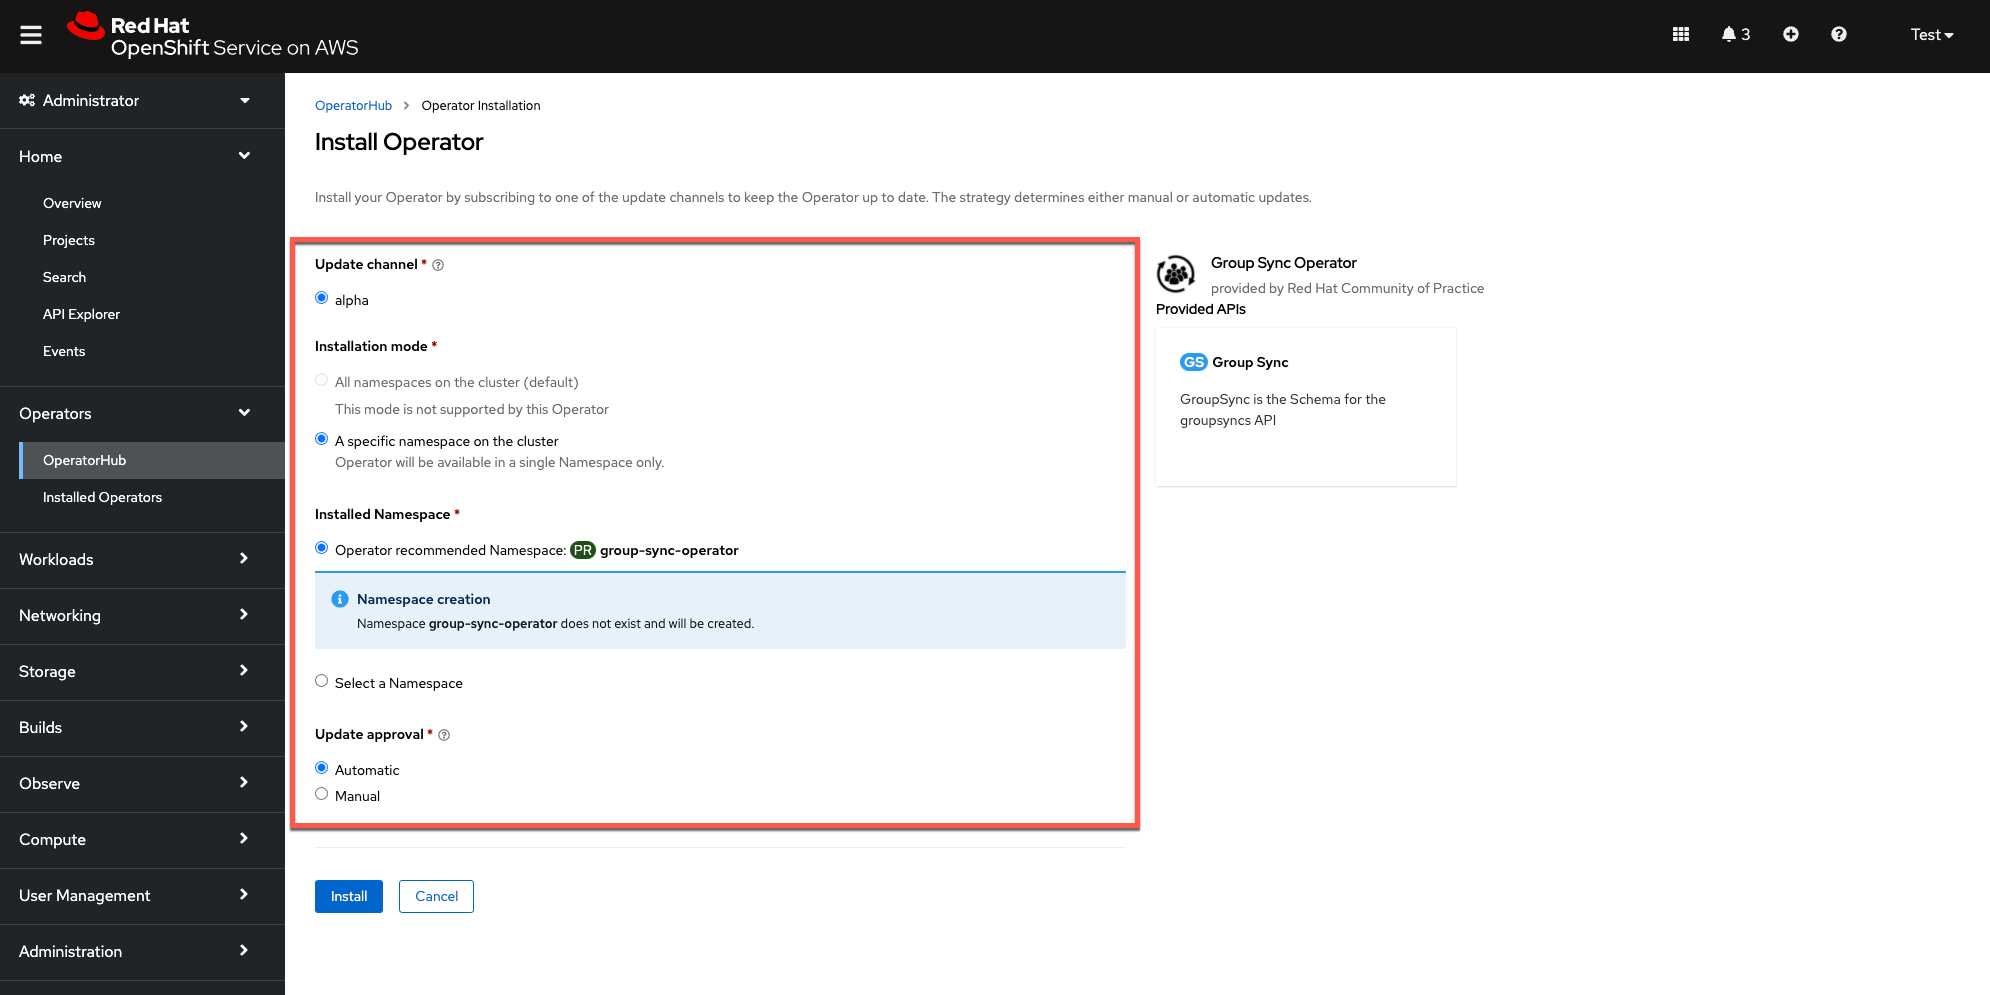
Create and configure a new Group Sync instance
Create a new secret named
azure-group-syncin the group-sync-operator namespace. For this you will need the following values:- AZURE_TENANT_ID
- AZURE_CLIENT_ID
- AZURE_CLIENT_SECRET
Using the OpenShift CLI, create the secret using the following format:
 oc create secret generic azure-group-sync \
 --from-literal=AZURE_TENANT_ID=<insert-id> \
 --from-literal=AZURE_CLIENT_ID=<insert-id> \
 --from-literal=AZURE_CLIENT_SECRET=<insert-secret>
Create a new Group Sync instance in the
group-sync-operatornamespace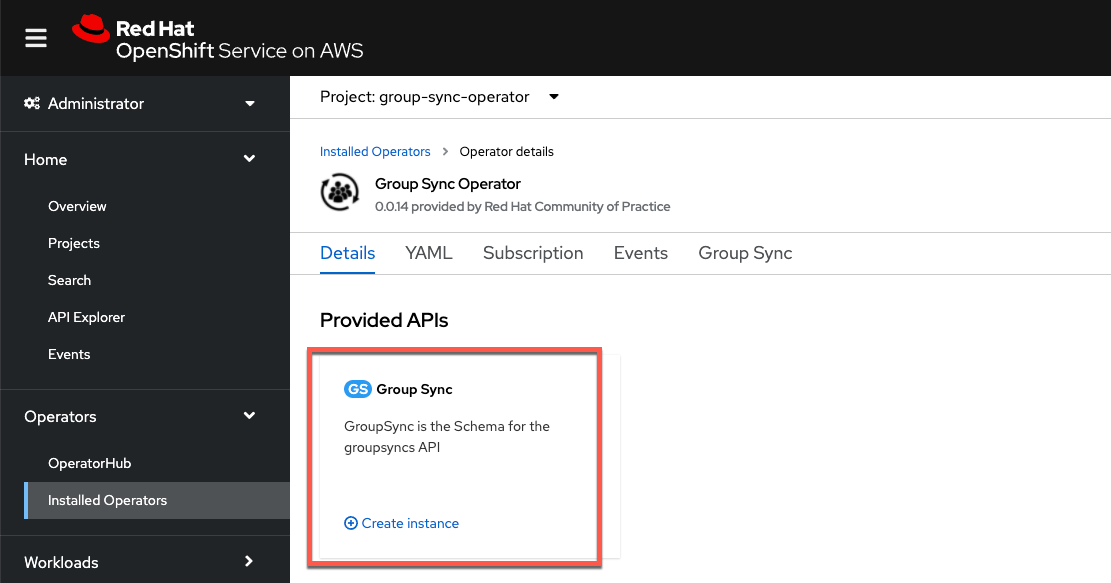
Select all the default YAML and replace is with a modified version of the the example below, customizingthe YAML to match the group names and save the configuration.
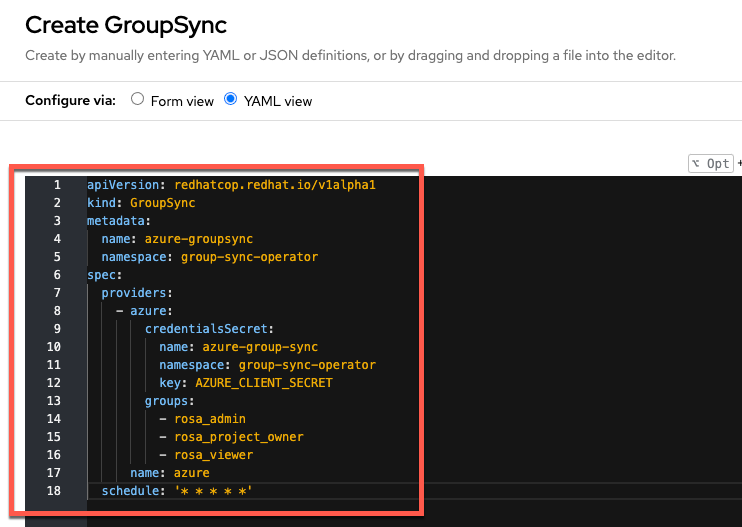
Sample YAML:
apiVersion: redhatcop.redhat.io/v1alpha1
kind: GroupSync
metadata:
    name: azure-groupsync
    namespace: group-sync-operator
spec:
    providers:
        - name: azure
          azure:
            credentialsSecret:
              name: azure-group-sync
              namespace: group-sync-operator
          groups:
            - rosa_admin
            - rosa_project_owner
            - rosa_viewer
          prune: false
    schedule: '* * * * *'
Set a synchronization schedule
The Group Sync Operator provides a cron-based scheduling parameter for specifying how often the groups and users should be synchronized. This can be set in the instance YAML file during initial configuration or at any time after.
The schedule setting of schedule: * * * * * would result in synchronization occuring every minute. It also supports the cron “slash” notation (e.g., “*/5 * * * *”, which would synchronize every five minutes).
Testing the synchronization process
Check to see if the Group Sync process has completed with a
Condition: ReconcileSuccessmessage
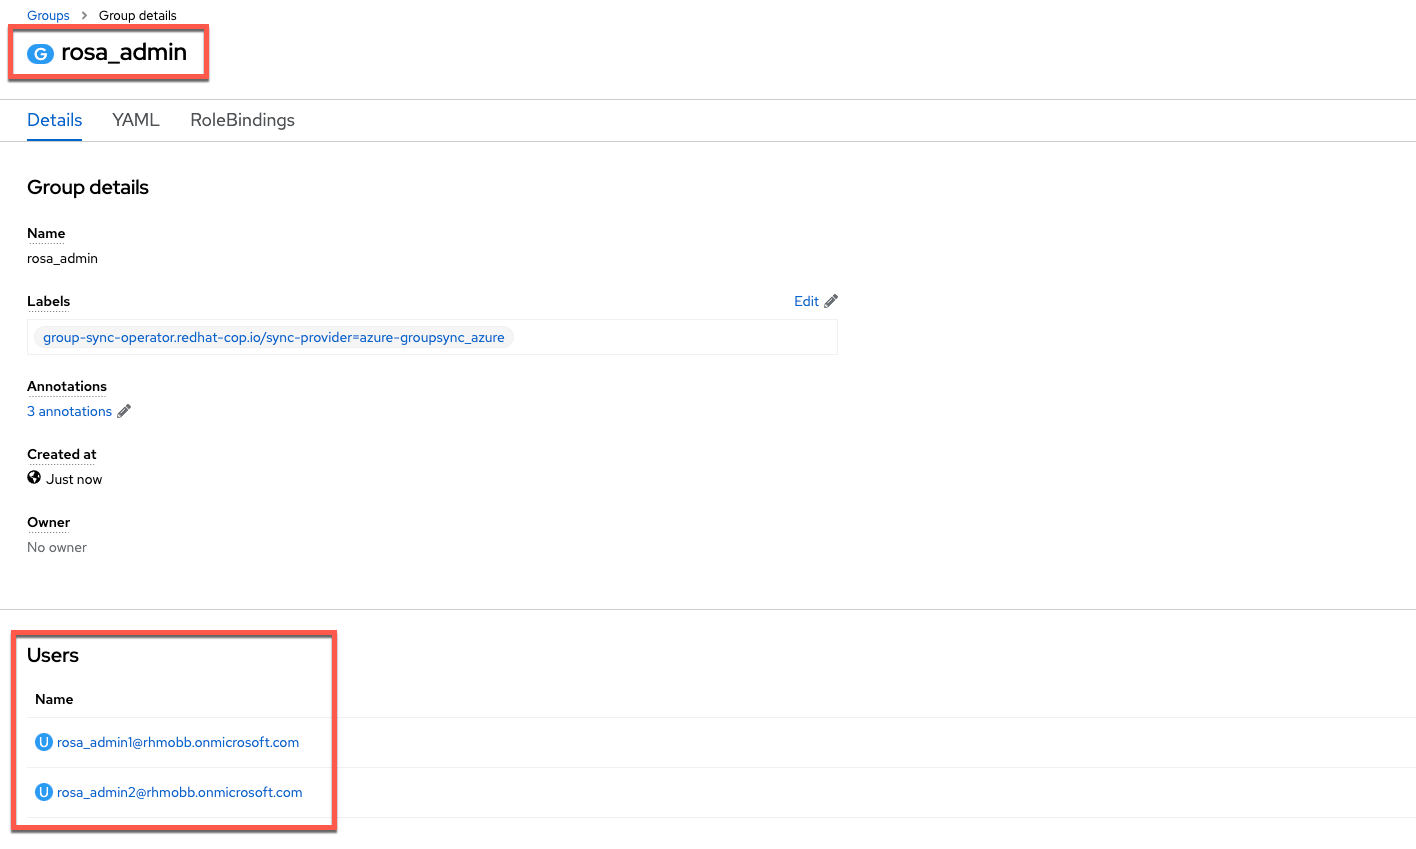
Check to see that all the groups specified in the configuration YAML file show up in the ROSA/OSD Groups list

Validate that all users specified in Azure AD also show up as members of the associated group in ROSA/OSD
Add a new user in Azure AD and assign it to the admin group
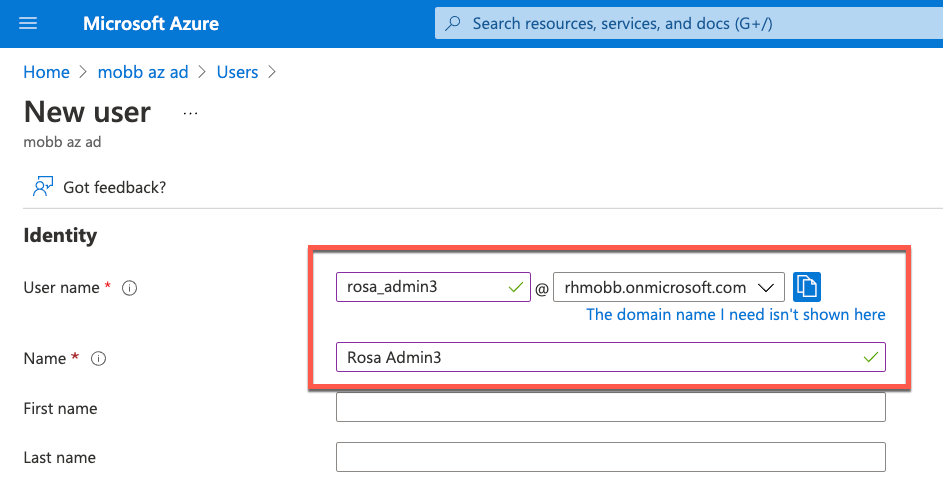
Verify that the user now appears in ROSA/OSD (after the specified synchronization time)

Now delete a user from the Azure AD admin group
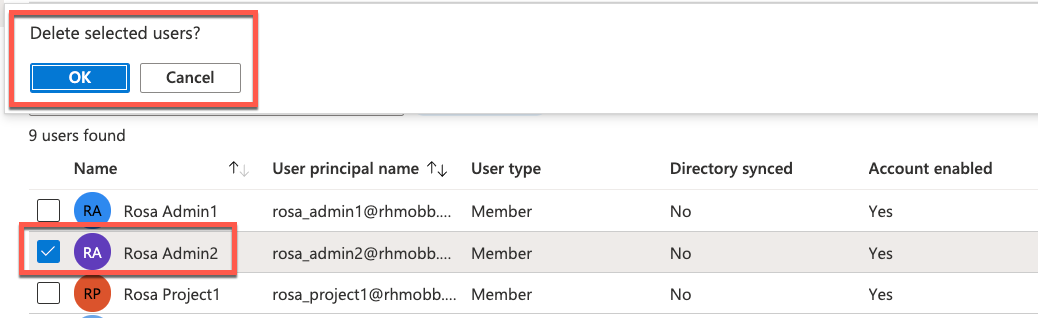
Verify the user has been deleted from the ROSA/OSD admin group

Binding Groups to Roles
The preceding steps provide a method to get group membership information into OpenShift, but the final step in translating that into user authorization control requires binding each group to a role or roles on the cluster. This can be done via the OCP web console by opening the Group detail, or by applying YAML via the CLI.
Additional Notes
The
prunekey in the YAML controls how the sync handles groups that are removed from Azure AD. If they key isn’t present, the default value isfalse, which means that if a group is removed from Azure AD, it will still persist in OpenShift. If it is set totrue, removal of a group from Azure AD will also remove the corresponding OpenShift Group.If there is a need to have multiple GroupSync configurations against multiple providers, note that there is no “merge” functionality in the operator when it comes to group membership. If a group named
ocp-adminsis present in two directories with sync jobs, they will effectively overwrite each other each time the sync job runs. It is recommended to name groups intended for use on OCP such that they indicate from which directory they originate (e.g.,azure-ocp-adminsor something likecontoso_ocp_adminsin the case of multiple Azure AD providers). Bind multiple groups with the same permissions needs to the sameRoleorClusterRoleas needed.